Wagtail Tutorial Series:
To learn more about Wagtail CMS, please check Build Blog With Wagtail CMS (4.0.0)
- Create Wagtail Project
- Modern Frontend Techs for Wagtail
- Dockerizing Wagtail App
- Add Blog Models to Wagtail
- How to write Wagtail page template
- Create Stylish Wagtail Pages with Tailwind CSS
- How to use StreamField in Wagtail
- Wagtail Routable Page
- Add Pagination Component to Wagtail
- Customize Wagtail Page URL
- Add Full Text Search to Wagtail
- Add Markdown Support to Wagtail
- Add LaTeX Support & Code Highlight In Wagtail
- How to Build Form Page in Wagtail
- How to Create and Manage Menus in Wagtail
- Wagtail SEO Guide
- Online Demo http://wagtail-blog.accordbox.com/
- Source code: https://github.com/AccordBox/wagtail-tailwind-blog
Wagtail Tips:
- Wagtail Tip #1: How to replace ParentalManyToManyField with InlinePanel
- Wagtail Tip #2: How to Export & Restore Wagtail Site
Write style in Wagtail:
- How to use SCSS/SASS in your Django project (Python Way)
- How to use SCSS/SASS in your Django project (NPM Way)
Other Wagtail Topics:
Objectives
By the end of this chapter, you should be able to:
- Build page layout with Tailwind CSS
- Understand Django
template-inheritance - Build custom Django template tag
Prerequisites
Before start, please make sure you already setup Tailwind CSS by following Modern Frontend Techs for Wagtail
Design
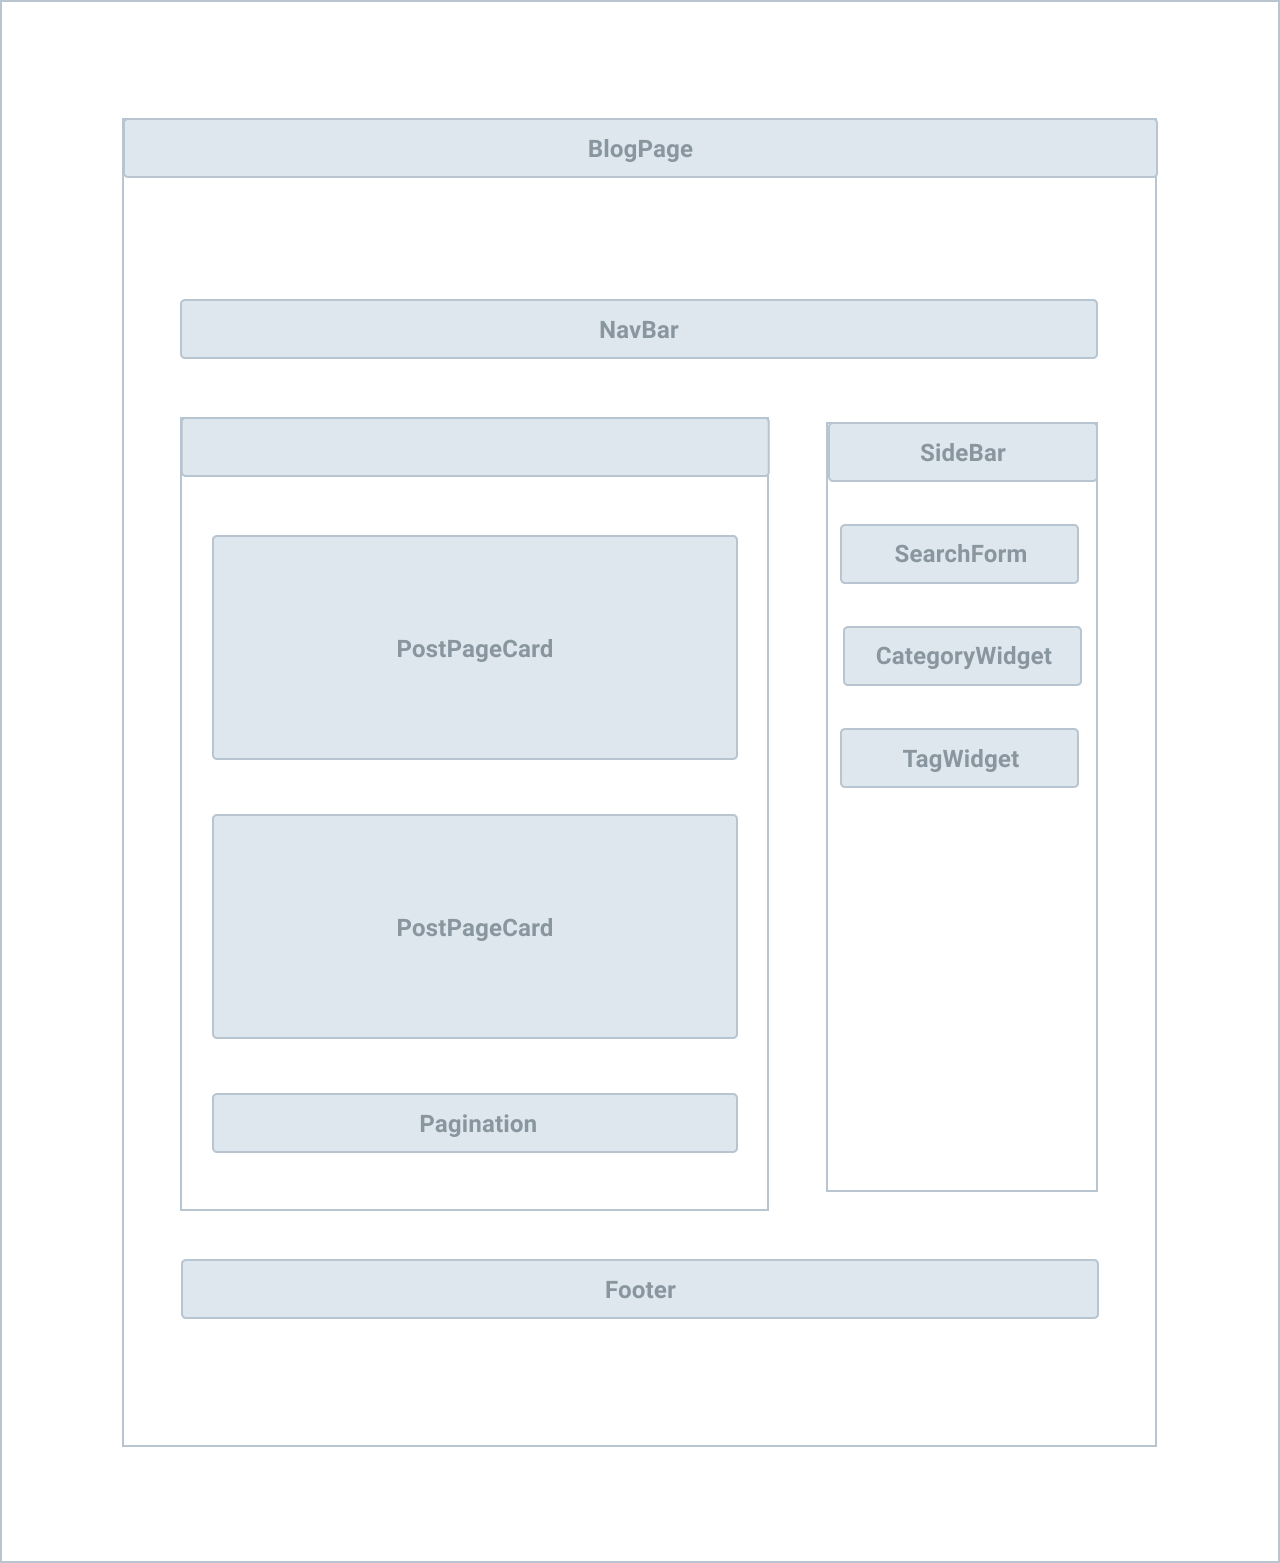
BlogPage
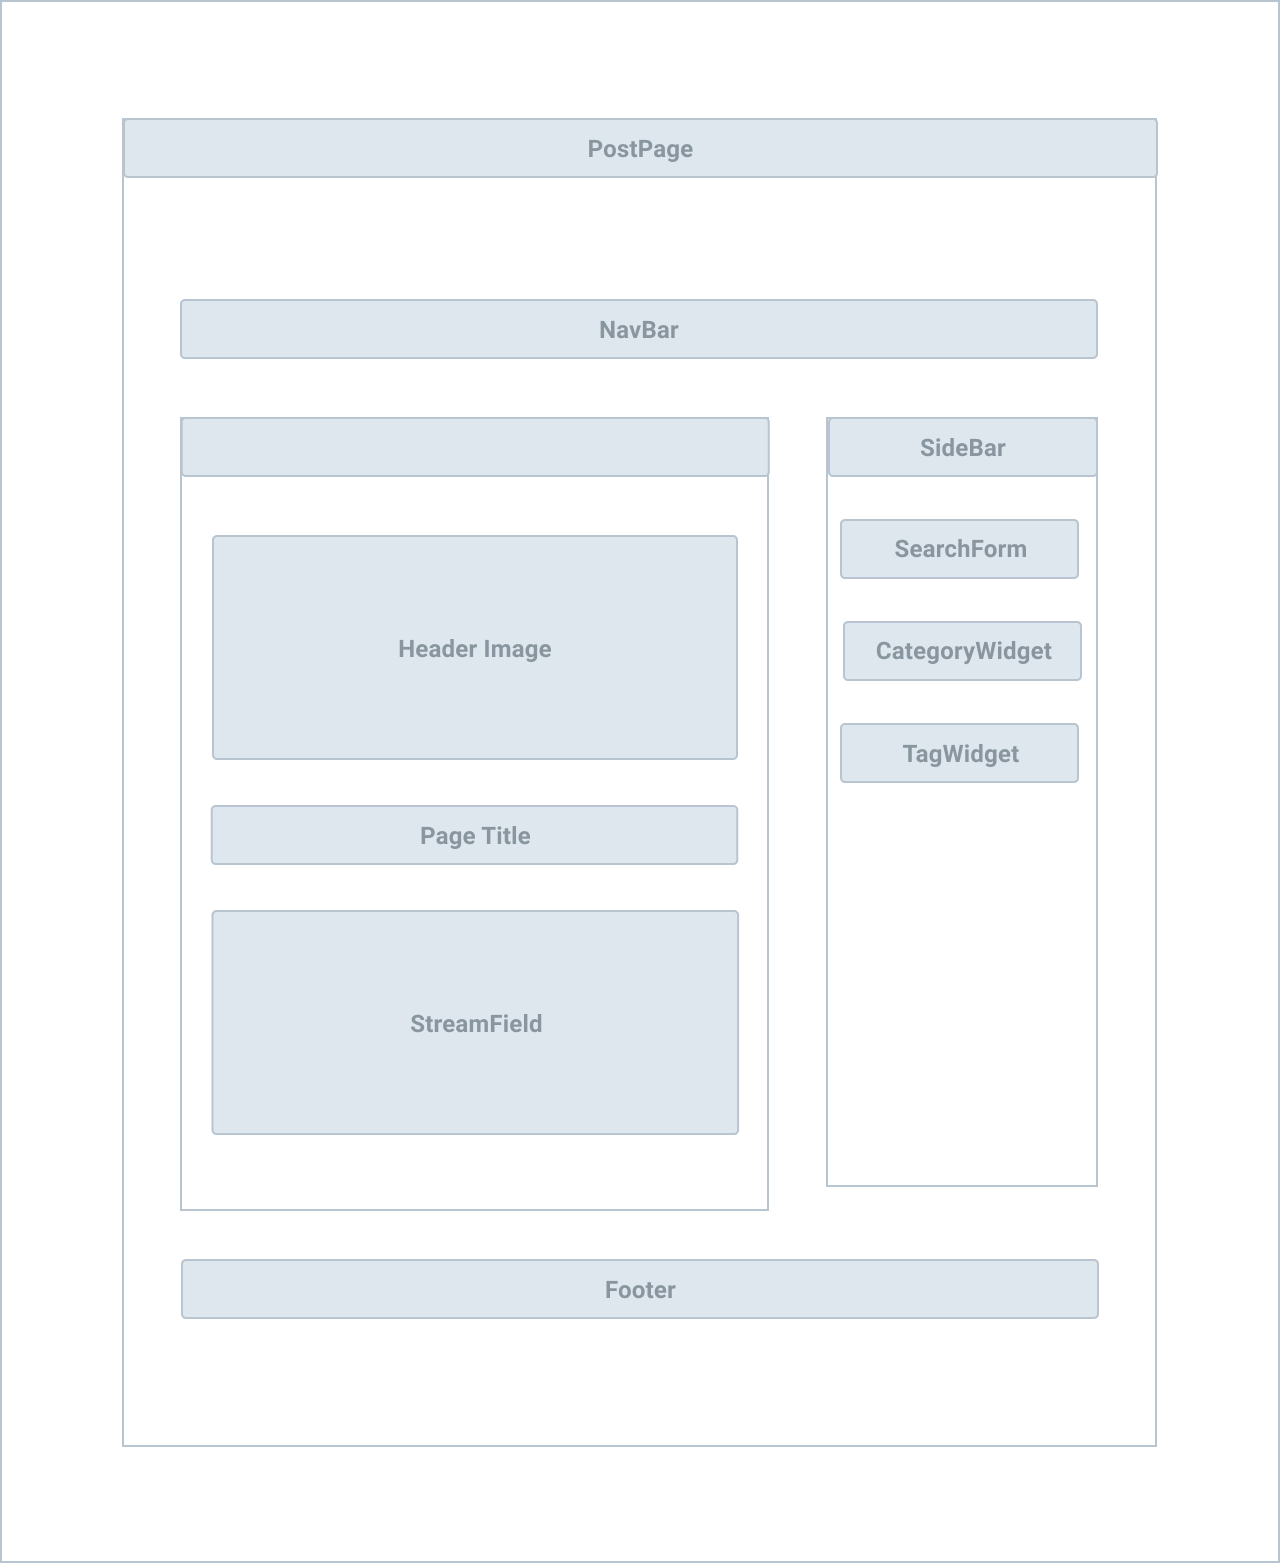
PostPage
Base Template
Let's create wagtail_app/templates/base.html
{% load static wagtailuserbar webpack_loader %}

<!DOCTYPE html>
<html class="h-100" lang="en">
  <head>
    <meta charset="utf-8" />
    <title>
        {% block title %}
            {% if self.seo_title %}{{ self.seo_title }}{% else %}{{ self.title }}{% endif %}
        {% endblock %}
        {% block title_suffix %}
            {% with self.get_site.site_name as site_name %}
                {% if site_name %}- {{ site_name }}{% endif %}
            {% endwith %}
        {% endblock %}
    </title>
    <meta name="description" content="" />
    <meta name="viewport" content="width=device-width, initial-scale=1" />

    {# Global stylesheets #}
    {% stylesheet_pack 'app' %}

    {% block extra_css %}
      {# Override this in templates to add extra stylesheets #}
    {% endblock %}

  </head>

  <body class="{% block body_class %}{% endblock %}">
    <div class="flex flex-col min-h-screen">

      {% wagtailuserbar %}

      {% include 'blog/components/navbar.html' %}

      <div class="w-full max-w-7xl mx-auto px-2 sm:px-6 lg:px-8">
        <div class="flex flex-row flex-wrap py-4">
          <main role="main" class="w-full sm:w-2/3 md:w-3/4 lg:w-8/12 px-2 mb-4">
            {% block content %}{% endblock %}
          </main>
          {% include 'blog/components/sidebar.html' %}
        </div>
      </div>

      {% include 'blog/components/footer.html' %}

    </div>
  </body>

  {# Global javascript #}
  {% javascript_pack 'app' %}

  {% block extra_js %}
    {# Override this in templates to add extra javascript #}
  {% endblock %}

</html>
Notes:
- Template inheritance allows you to build a
base “skeleton”template that contains all the common elements of your site and defines blocks that child templates can override - With Django
includetemplate tag, we can loads a template and renders it with the current context. Django doc
NavBar
Let's create wagtail_app/templates/blog/components/navbar.html, which is loaded by {% include 'blog/components/navbar.html' %} in the wagtail_app/templates/base.html
<nav class="bg-white border-b border-opacity-75 border-gray-300 dark:bg-gray-900 dark:text-white">
  <div class="mx-auto max-w-7xl px-2 sm:px-6 lg:px-8">
    <div class="relative flex items-center justify-between h-16">

      <div class="flex-1 flex items-center justify-center sm:items-stretch sm:justify-start">
        <div class="flex-shrink-0 flex items-center">
          <a href="/"><span class="text-bold text-grey-800">Wagtail Blog Demo</span></a>
        </div>
        <div class="hidden sm:block sm:ml-6">
          <div class="flex space-x-4">
            <a href="#"
               class="text-gray-500 hover:bg-gray-700 hover:text-white px-3 py-2 rounded-md text-sm font-medium">Dashboard</a>
            <a
              href="#"
              class="text-gray-500 hover:bg-gray-700 hover:text-white px-3 py-2 rounded-md text-sm font-medium">Team</a>
            <a
              href="#"
              class="text-gray-500 hover:bg-gray-700 hover:text-white px-3 py-2 rounded-md text-sm font-medium">Projects</a>
            <a
              href="#"
              class="text-gray-500 hover:bg-gray-700 hover:text-white px-3 py-2 rounded-md text-sm font-medium">Calendar</a>
          </div>
        </div>
      </div>

    </div>
  </div>
</nav>
- We will update
navbar.htmlin a bit, now it only works on the desktop browser.
Footer
Create wagtail_app/templates/blog/components/footer.html which is loaded by {% include 'blog/components/footer.html' %} in the wagtail_app/templates/base.html
<footer
  class="mt-auto py-7 bg-white border-t border-opacity-75 border-gray-300">
  <div class="container mx-auto">
    <p class="m-0 text-center text-blue-700 hover:underline">
      Built by <a href="https://www.accordbox.com/">[email protected]</a>
    </p>
  </div>
</footer>
Sidebar
Create wagtail_app/templates/blog/components/sidebar.html which is loaded by {% include 'blog/components/sidebar.html' %} in the wagtail_app/templates/base.html
<div class="w-full sm:w-1/3 md:w-1/4 lg:w-4/12 px-2">

  <div>Sidebar</div>

</div>
BlogPage
Update wagtail_app/templates/blog/blog_page.html
{% extends "base.html" %}
{% load wagtailcore_tags wagtailimages_tags %}
{% block content %}
{% for post in page.get_children.specific %}
<div class="mb-4 rounded-lg border border-opacity-75 border-gray-300 shadow-xl overflow-hidden">
{% if post.header_image %}
{% image post.header_image original as header_image %}
<a href="{% pageurl post %}">
<img src="{{ header_image.url }}">
</a>
{% endif %}
<div class="p-6">
<h2 class="title-font text-3xl text-blue-900 mb-6">
<a href="{% pageurl post %}">{{ post.title }}</a>
</h2>
<p>
{{ post.search_description }}
</p>
<a href="{% pageurl post %}" class="px-4 py-3 text-white bg-blue-500 border border-blue-500 hover:bg-blue-600 rounded-lg">Read More →</a>
</div>
<div class="bg-gray-100 px-6 py-4">
<h4 class="text-base text-gray-900">Posted on {{ post.last_published_at }}</h4>
</div>
</div>
{% endfor %}
{% endblock %}
Notes:
- With Django
extendstemplate tag, we start using Djangotemplate-inheritance. - The HTML in
{% block content %}would override{% block content %}in wagtail_app/templates/base.html, you can check Django doc: Template inheritance to learn more
# please make sure `npm run start` is running in another terminal

$ docker-compose up -d
$ docker-compose logs -f
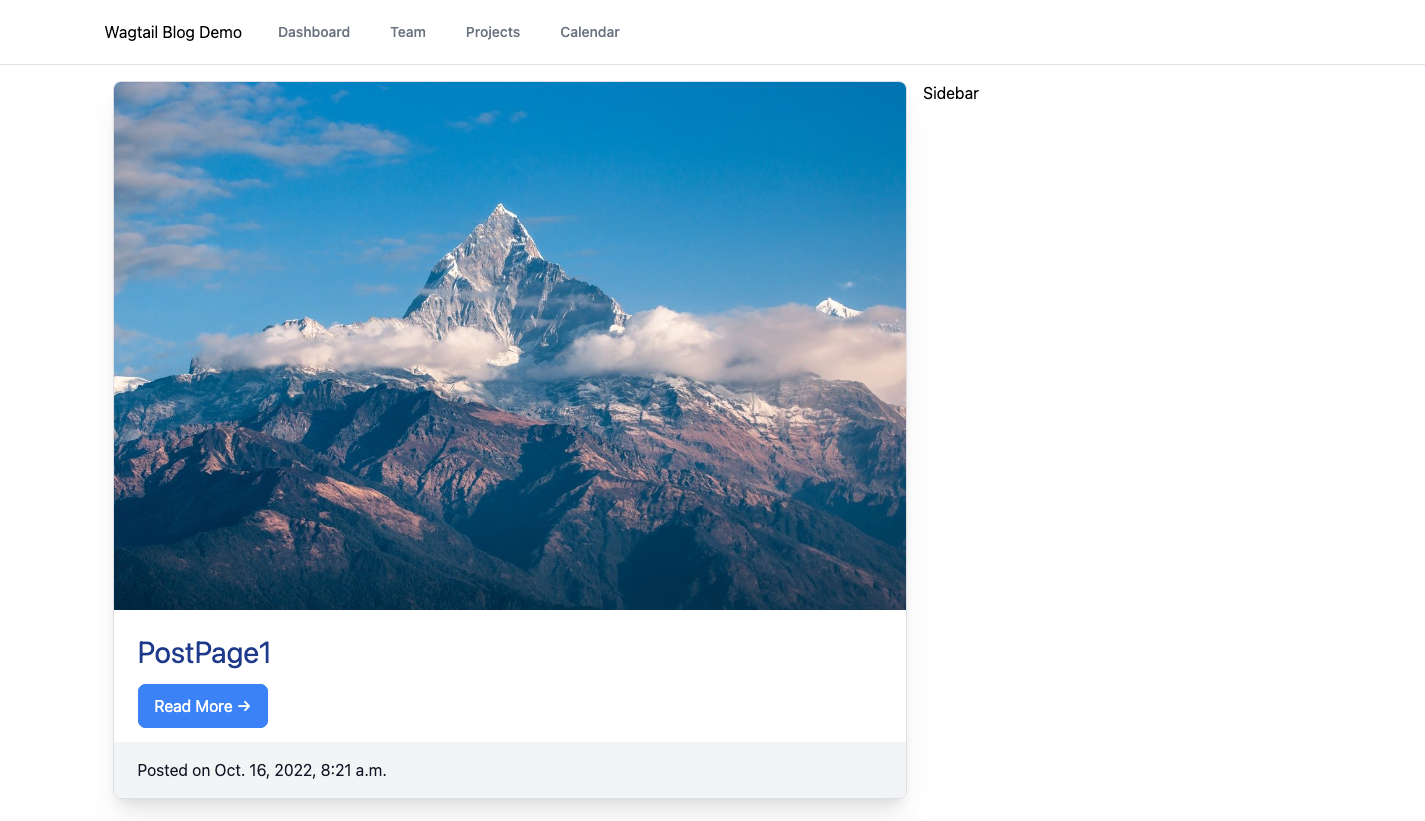
If we check the blog page, it looks like
PostPage
Update wagtail_app/templates/blog/post_page.html
{% extends "base.html" %}

{% load wagtailcore_tags wagtailimages_tags %}

{% block content %}

  {% image page.header_image original as header_image %}
  <img src="{{ header_image.url }}" alt="{{ header_image.alt }}">

  <h1>{{ page.title }}</h1>

{% endblock %}
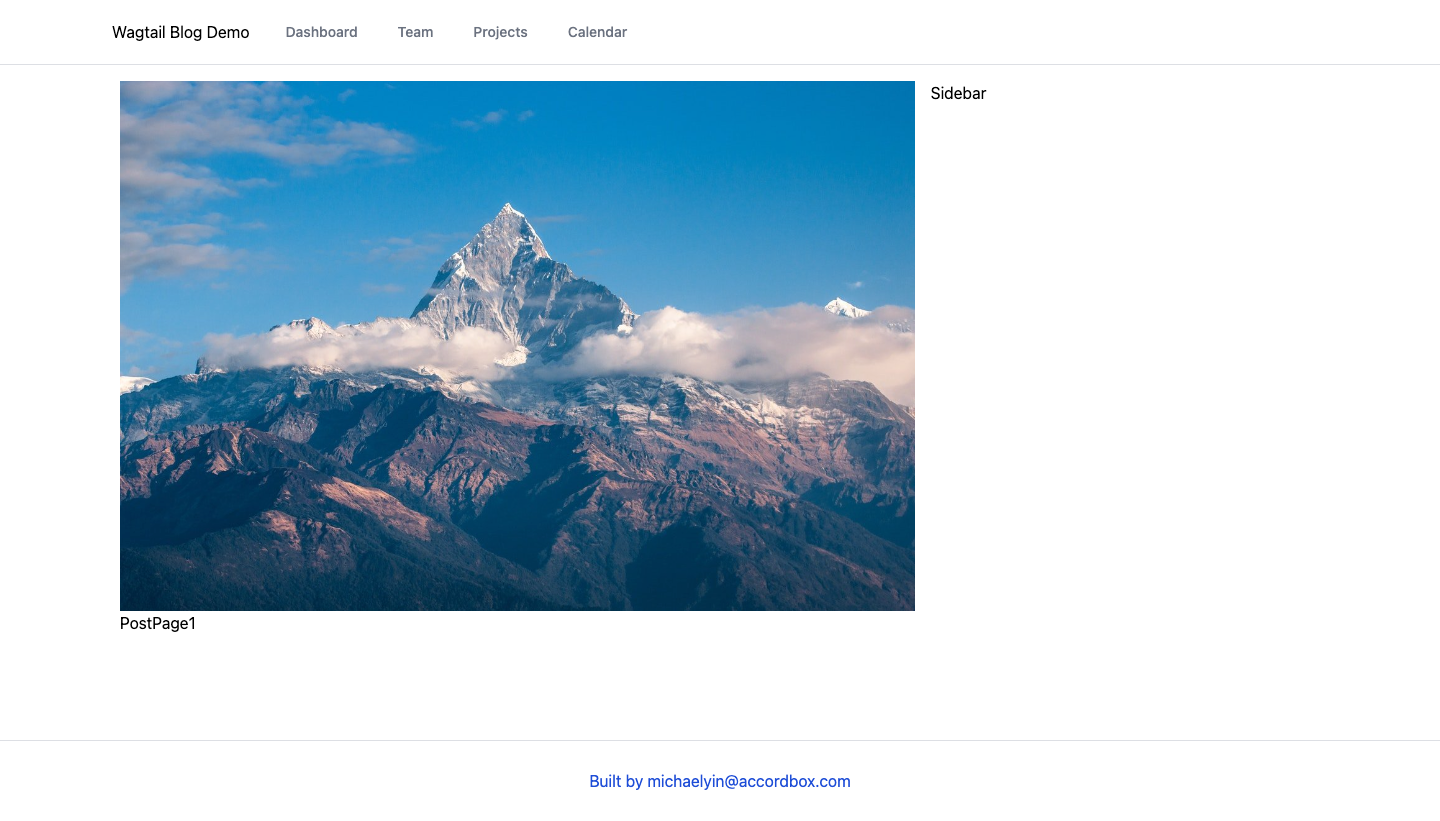
If we check the post page, it looks like
Category Widget
Next, let's add Category widget to the sidebar.
To keep the template clean, we will create a custom Django template tag to do this.
$ mkdir wagtail_app/blog/templatetags
$ touch wagtail_app/blog/templatetags/__init__.py
Create wagtail_app/blog/templatetags/blogapp_tags.py
from ..models import BlogCategory, Tag
from django.template import Library, loader

register = Library()


@register.inclusion_tag('blog/components/categories_list.html',
                        takes_context=True)
def categories_list(context):
    categories = BlogCategory.objects.all()
    return {
        'request': context['request'],
        'categories': categories
    }
Notes:
- The logic is very simple, we get all
BlogCategoryinstances from the DB and display it in template. - The
blog/components/categories_list.htmlis the template which will be used to render HTML - You can check Custom template tags and filters
Create wagtail_app/templates/blog/components/categories_list.html
<div class="mb-4 border rounded-lg border-opacity-75 border-gray-300 shadow-xl overflow-hidden ">
  <div class="bg-gray-100 text-gray-900 px-6 py-4 ">
    <h4 class="text-base font-medium">Categories</h4>
  </div>
  <div class="px-6 py-4">
    <nav class="list-none">
      {% for category in categories %}
        <li>
          <a href="#" class="text-gray-600 hover:text-gray-800 no-underline hover:underline ">
            {{ category.name }}
          </a>
        </li>
      {% empty %}
        'No categories yet'
      {% endfor %}
    </nav>
  </div>
</div>
Tag Widget
Update wagtail_app/blog/templatetags/blogapp_tags.py
@register.inclusion_tag('blog/components/tags_list.html',
                        takes_context=True)
def tags_list(context):
    tags = Tag.objects.all()
    return {
        'request': context['request'],
        'tags': tags
    }
Create wagtail_app/templates/blog/components/tags_list.html
<div class="mb-4 border rounded-lg border-opacity-75 border-gray-300 shadow-xl overflow-hidden">
  <div class="bg-gray-100 text-gray-900 px-6 py-4">
    <h4 class="text-base font-medium">Tags</h4>
  </div>
  <div class="px-6 py-4">

    {% for tag in tags %}
      <a href="#" class="text-gray-600 hover:text-gray-800">
        <span class="inline-flex items-center justify-center px-2 py-1 mr-2 text-xs font-bold leading-none text-white bg-gray-600 hover:bg-gray-500 focus:bg-gray-700 rounded-full">{{ tag }}</span>
      </a>
    {% empty %}
      No tags yet
    {% endfor %}

  </div>
</div>
Sidebar
After we build tags_list and categories_list, let's update wagtail_app/templates/blog/components/sidebar.html
{% load blogapp_tags %}

<div class="w-full sm:w-1/3 md:w-1/4 lg:w-4/12 px-2">

  {% categories_list %}

  {% tags_list %}

</div>
Notes:
- At the top, we
load blogapp_tagsso the above template tags would be available in thesidebar.html(Likeimportstatement in Python) - We call
categories_listandtags_listto render the category list and tag list on the sidebar.
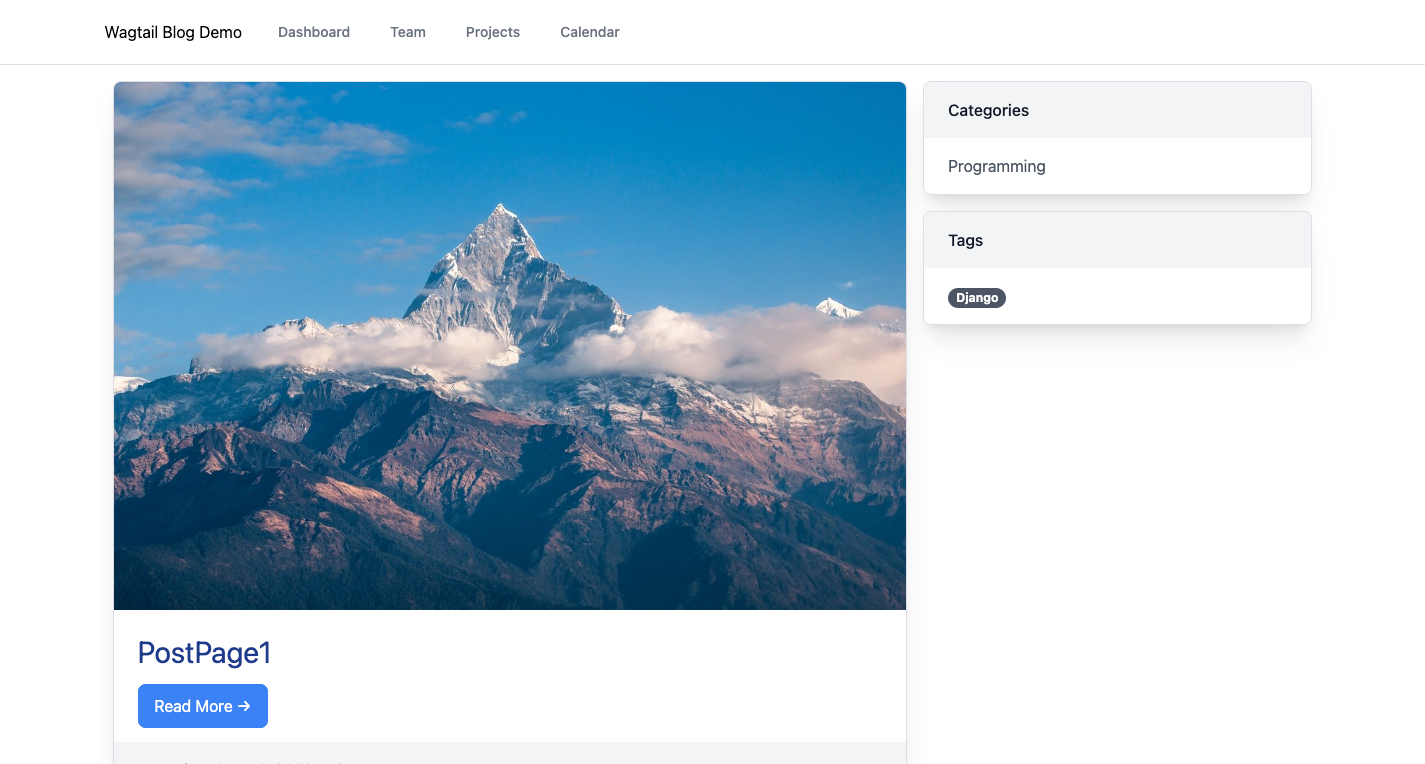
As you can see, now the Category widget and Tag widget are working in the sidebar.
Wagtail Tutorial Series:
To learn more about Wagtail CMS, please check Build Blog With Wagtail CMS (4.0.0)
- Create Wagtail Project
- Modern Frontend Techs for Wagtail
- Dockerizing Wagtail App
- Add Blog Models to Wagtail
- How to write Wagtail page template
- Create Stylish Wagtail Pages with Tailwind CSS
- How to use StreamField in Wagtail
- Wagtail Routable Page
- Add Pagination Component to Wagtail
- Customize Wagtail Page URL
- Add Full Text Search to Wagtail
- Add Markdown Support to Wagtail
- Add LaTeX Support & Code Highlight In Wagtail
- How to Build Form Page in Wagtail
- How to Create and Manage Menus in Wagtail
- Wagtail SEO Guide
- Online Demo http://wagtail-blog.accordbox.com/
- Source code: https://github.com/AccordBox/wagtail-tailwind-blog
Wagtail Tips:
- Wagtail Tip #1: How to replace ParentalManyToManyField with InlinePanel
- Wagtail Tip #2: How to Export & Restore Wagtail Site
Write style in Wagtail:
- How to use SCSS/SASS in your Django project (Python Way)
- How to use SCSS/SASS in your Django project (NPM Way)
Other Wagtail Topics: