
Django PWA Tutorial Series:
- Introduction
- Add Web app manifest to Django
- Add Service Worker to Django
- Fallback Offline Page in Django
- Caching and Routing (coming soon)
- How to add install button to PWA (coming soon)
- Send Web Push Notification from Django (part 1) (coming soon)
- Send Web Push Notification from Django (part 2) (coming soon)
The source code is available on https://github.com/AccordBox/django-pwa-demo
Objective
By the end of this chapter, you should be able to:
- Understand what is
Service Worker, and the life cycle. - Learn to develop
Service WorkerwithWorkboxpackages. - Serve
Service Workerin Django.
Basic concepts
A service worker is a type of web worker. It's essentially a JavaScript file that runs separately from the main browser thread, intercepting network requests, caching or retrieving resources from the cache, and delivering push messages.
Because workers run separately from the main thread, service workers are independent of the application they are associated with.
Service worker lifecycle:
A service worker goes through three steps in its lifecycle:
- Registration
- Installation
- Activation
Scope
The scope of the service worker determines which files the service worker controls, in other words, from which path the service worker will intercept requests. The default scope is the location of the service worker file, and extends to all directories below. So if service-worker.js is located in the root directory, the service worker will control requests from all files at this domain.
As you know, Django developers usually put JS files under /static/js path. To resolve this issue, we should create a Django view for /sw.js and return content of /static/js/sw.js back.
Vanilla js
I have seen some people and online resource teaching people to write Service worker in vanilla js.
However, this is not the best way.
As I said, frontend ecosystem is very great now. We can use other package to help us get things done in easier and better way.
Workbox
Workbox is a set of libraries that can power a production-ready service worker for your Progressive Web App.
Let's first install workbox-webpack-plugin to our frontend project.
$ cd frontend
$ npm install workbox-webpack-plugin
Update frontend/webpack/webpack.common.js
const {InjectManifest} = require('workbox-webpack-plugin');

plugins: [
  ...
  new InjectManifest({
    swSrc: './src/sw.js',
  }),
],
Notes:
- We add
const {InjectManifest} = require('workbox-webpack-plugin');at the top. - We add
InjectManifestto theplugins, and set theservice workersource file path. - With
injectManifest, we have more control of theService Workerand we will do more things in the next chapters.
Let's create frontend/src/sw.js
const manifest = self.__WB_MANIFEST;
if (manifest) {
  // do nothing
}

self.addEventListener('install', function(event) {
  console.log('service worker install');
});

self.addEventListener('activate', function(event) {
  console.log('service worker activate');
});

self.addEventListener('fetch', event => {
  console.log(`fetch ${event.request.url}`);
});
Notes:
- I will talk about
const manifest = self.__WB_MANIFEST;later, now we can ignore it. - We added event handler to
install,activateandfetch.
$ cd frontend
$ npm run watch
We can ignore the warning below:
WARNING in InjectManifest has been called multiple times, perhaps due to running webpack in --watch mode. The precache manifest generated after the first call may be inaccurate! Please see https://github.com/GoogleChrome/workbox/issues/1790 for more information.
This is the directory structure
build
├── assets
│       # files omitted for brevity
├── css
│       # files omitted for brevity
├── index.html
├── js
│       # files omitted for brevity
├── manifest.json
├── sw.js                    # new
Serve Service Worker
Next, we will use Django view to serve the frontend/build/sw.js.
Create django_pwa_app/views.py
from django.conf import settings
from django.http import HttpResponse


def service_worker(request):
    sw_path = settings.BASE_DIR / "frontend/build" / "sw.js"
    response = HttpResponse(open(sw_path).read(), content_type='application/javascript')
    return response
- The logic is very simple, we read the content of the
frontend/build/sw.jsand return it back.
Update django_pwa_app/urls.py
from django.contrib import admin
from django.urls import path
from django.views.generic import TemplateView
import django_pwa_app.views

urlpatterns = [
    path('', TemplateView.as_view(template_name="index.html")),
    path('sw.js', django_pwa_app.views.service_worker),                 # new
    path('admin/', admin.site.urls),
]
Let's run django server and do a test
(env)$ python manage.py runserver
# check on http://127.0.0.1:8000/sw.js
Register Service Worker
Update frontend/src/application/app.js
import "../styles/index.scss";

import "bootstrap/dist/js/bootstrap.bundle";

if ('serviceWorker' in navigator) {
  window.addEventListener('load', () => {
    navigator.serviceWorker.register('/sw.js').then(registration => {
      console.log('SW registration succeeded:', registration);
      navigator.serviceWorker.ready
        .then(function (registration) {
          console.log('SW is active:', registration.active);


        });
    }).catch(registrationError => {
      console.log('SW registration failed: ', registrationError);
    });
  });
}
'serviceWorker' in navigatoris to check if the browser supportsservice workernavigator.serviceWorker.registeris to register the service workernavigator.serviceWorker.readyis to make sure the service worker is active now.
First Load
Now, let's visit http://127.0.0.1:8000/ for the first time.
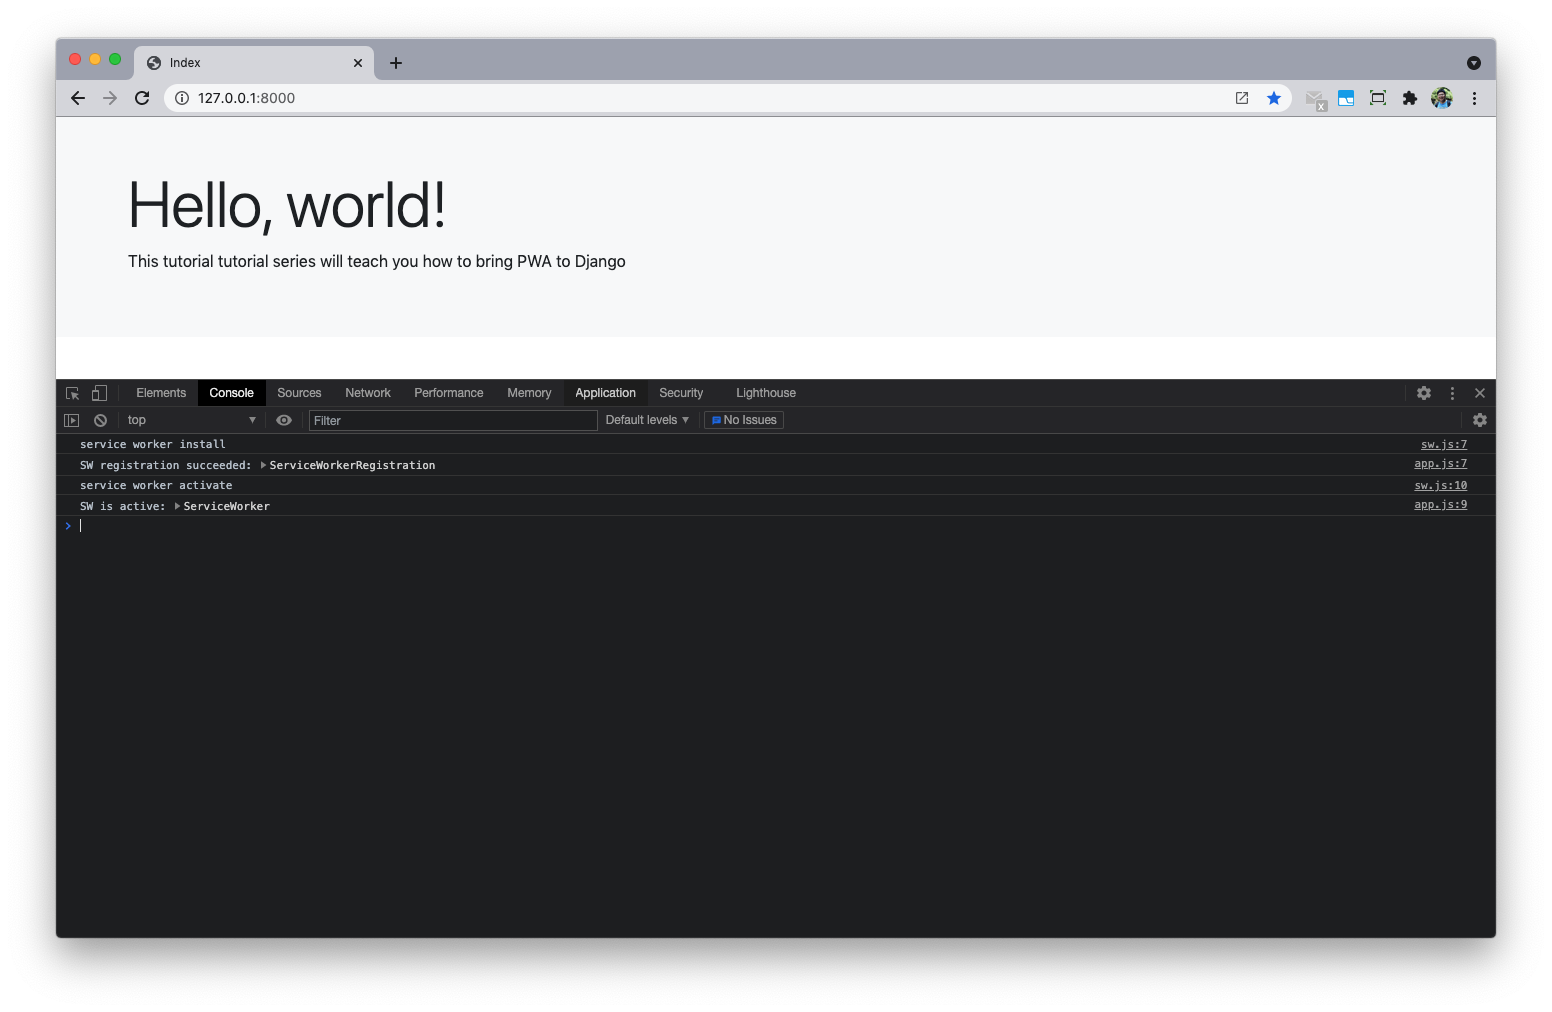
If we open the devtools, we will see some messages in the console.
sw.js:7 service worker install
app.js:7 SW registration succeeded: ServiceWorkerRegistration {installing: ServiceWorker, waiting: null, active: null, navigationPreload: NavigationPreloadManager, scope: "http://127.0.0.1:8000/", …}
sw.js:10 service worker activate
app.js:9 SW is active: ServiceWorker {scriptURL: "http://127.0.0.1:8000/sw.js", state: "activating", onstatechange: null, onerror: null}
activateevent is fired after theinstallevent.
Second Load
Now let's refresh the page and check the console again.
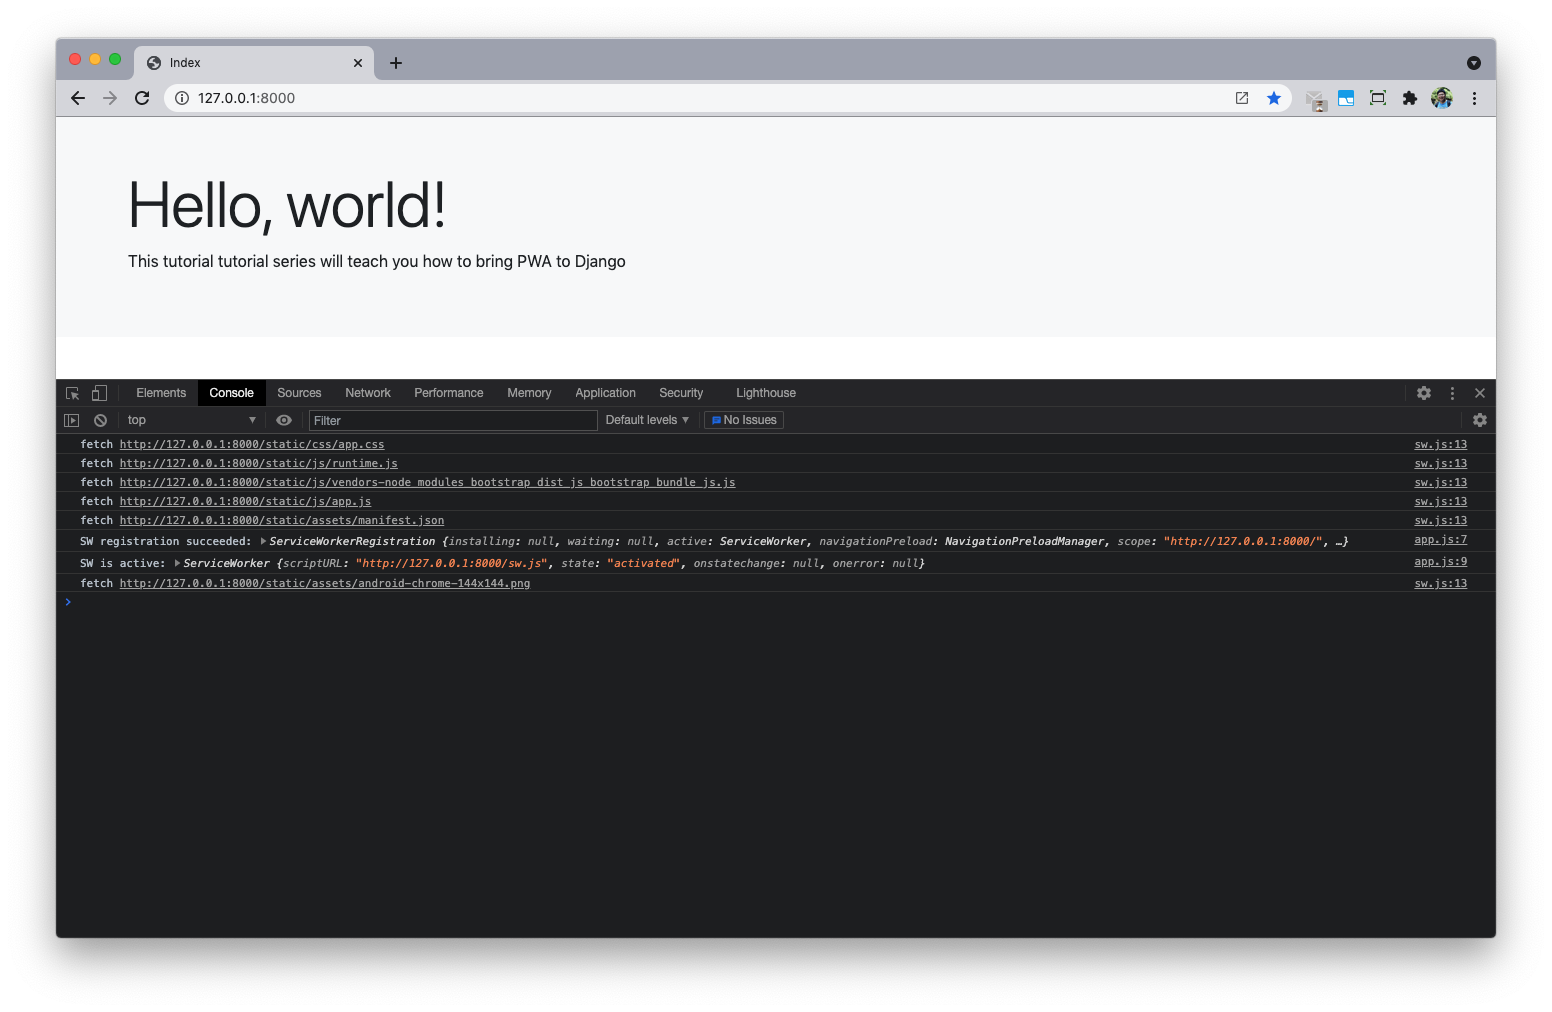
sw.js:13 fetch http://127.0.0.1:8000/static/css/app.css
sw.js:13 fetch http://127.0.0.1:8000/static/js/runtime.js
sw.js:13 fetch http://127.0.0.1:8000/static/js/vendors-node_modules_bootstrap_dist_js_bootstrap_bundle_js.js
sw.js:13 fetch http://127.0.0.1:8000/static/js/app.js
app.js:7 SW registration succeeded: ServiceWorkerRegistration {installing: null, waiting: null, active: ServiceWorker, navigationPreload: NavigationPreloadManager, scope: "http://127.0.0.1:8000/", …}
sw.js:13 fetch http://127.0.0.1:8000/static/assets/manifest.json
app.js:9 SW is active: ServiceWorker {scriptURL: "http://127.0.0.1:8000/sw.js", state: "activated", onstatechange: null, onerror: null}
sw.js:13 fetch http://127.0.0.1:8000/static/assets/android-chrome-144x144.png
Notes:
- A
fetchevent fires every time any resource controlled by a service worker is fetched, which includes the documents inside thescope - The
installandactivateevent are not fired this time because the service worker is already running
Update Service Worker
Please open chrome devtools, go to Application tab and click the Service Worker on the left sidebar.
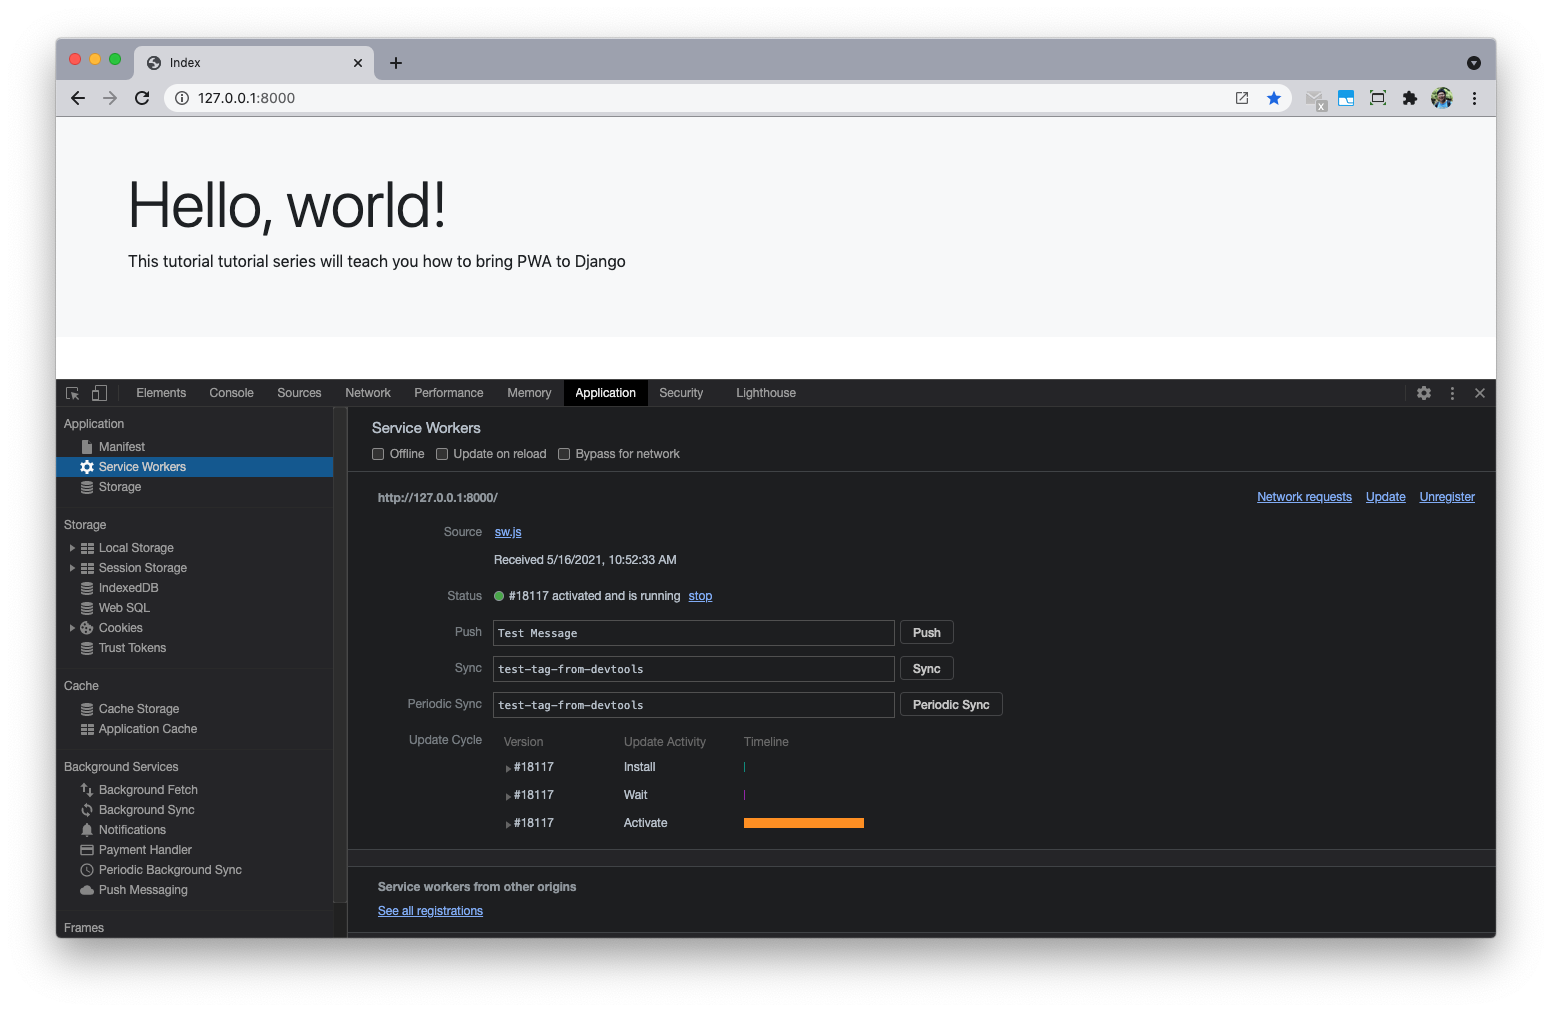
- We can see the service worker is
active and running. - And we can click the top right link to
UpdateorUnregisterthe service worker.
There will be a point in time where your service worker will need updating. When that time comes, you'll need to follow these steps:
- Update your service worker JavaScript file. When the user navigates to your site, the browser tries to redownload the script file that defined the service worker in the background. If there is even a byte's difference in the service worker file compared to what it currently has, it considers it new.
- Your new service worker will be started and the install event will be fired.
- At this point the old service worker is still controlling the current pages so the new service worker will enter a waiting state.
- When the currently open pages of your site are closed, the old service worker will be killed and the new service worker will take control.
- Once your new service worker takes control, its activate event will be fired.
You can check Update a service worker to learn more.
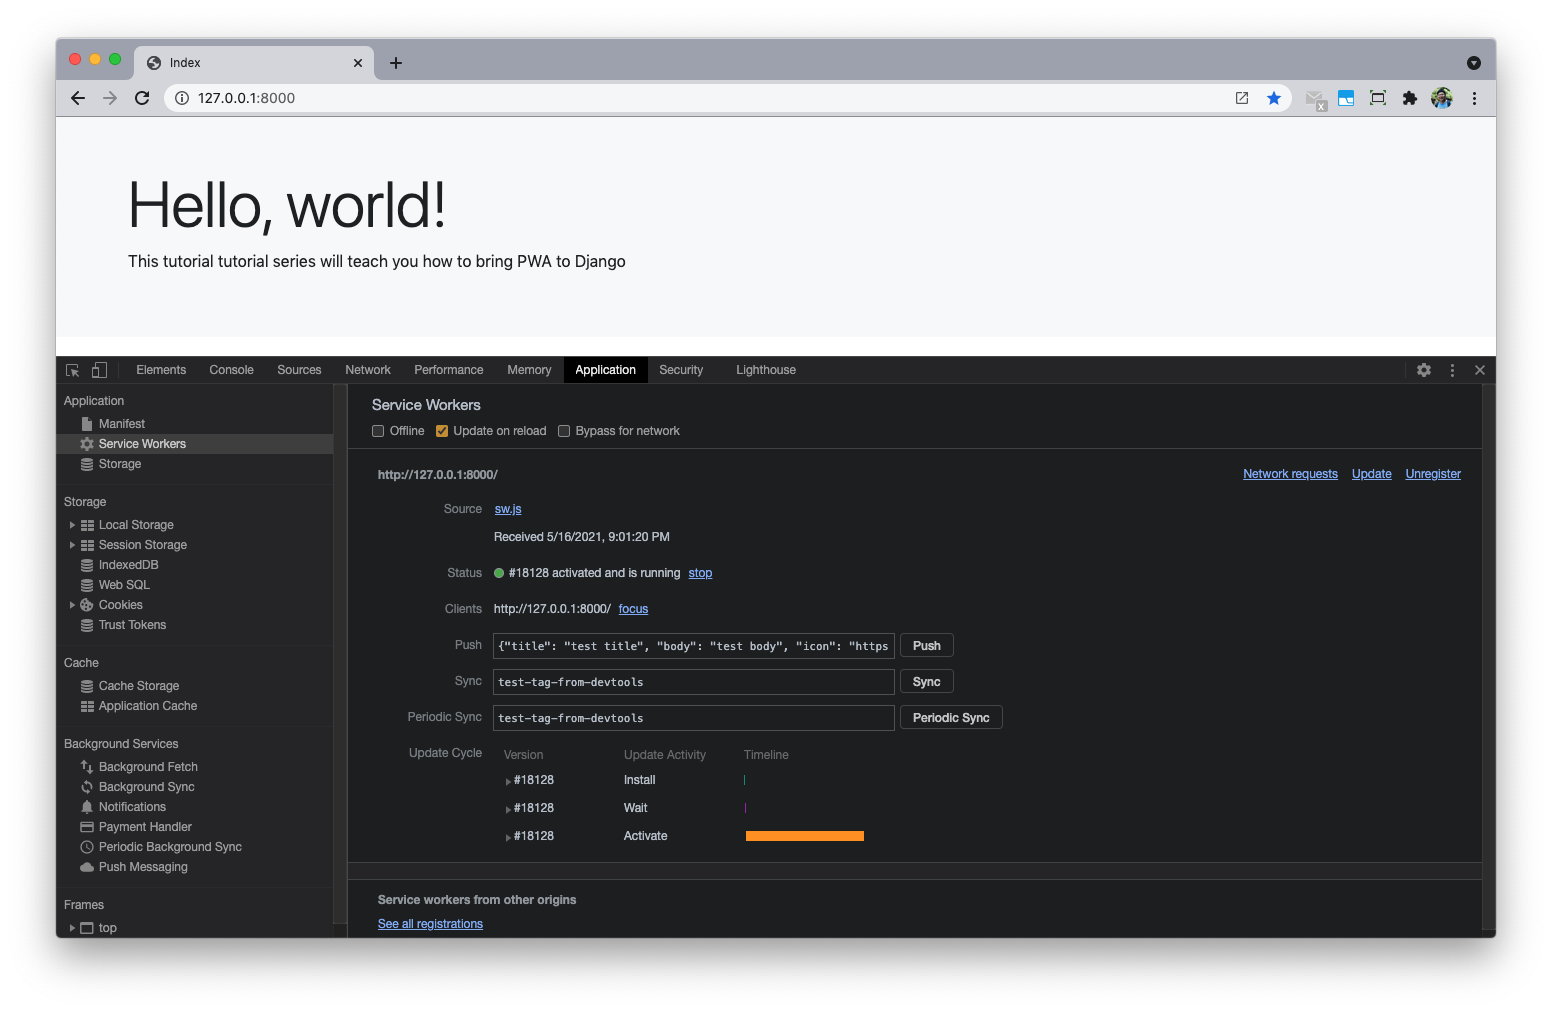
During the development, we can click the Update on realod checkbox, this can force the browser always install the latest service worker
Notes:
- Service worker can only work on
localhostorHTTPS. - If you want to test HTTPS on local env, please check ngrok
- It is not recommended test SW in the incognitoe window.
Please check Service worker lifecycle if you want to know more.
Django PWA Tutorial Series:
- Introduction
- Add Web app manifest to Django
- Add Service Worker to Django
- Fallback Offline Page in Django
- Caching and Routing (coming soon)
- How to add install button to PWA (coming soon)
- Send Web Push Notification from Django (part 1) (coming soon)
- Send Web Push Notification from Django (part 2) (coming soon)
The source code is available on https://github.com/AccordBox/django-pwa-demo